How to Link Setek Range Extender to Your Netgear Router?
- 29 Views
- alllweekendnews
- March 27, 2024
- Tech
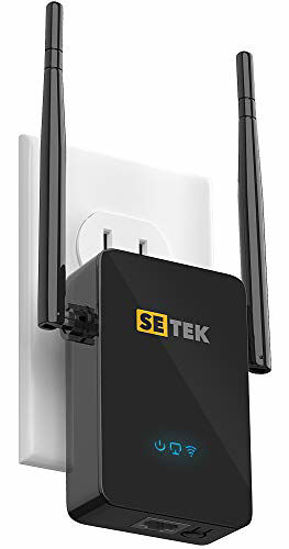
Setek range extender is one of the famous networking devices that used worldwide. It is easy to connect range extender with router (any brand) via Ethernet cable or wirelessly (WPS button).
Here, you will go through a tour of Setek WiFi extender setup in your home. There are easy steps to complete the installation that are hardware linking with router and access the interface of the Setek device.
You will also get to know some troubleshooting tips that help you to make the extender performance and establish the connection securely. So, lets start this article with setup process first step.
How to Connect Setek Extender to Netgear Router?
There are simple steps that help you to establish a strong bond between the Setek WiFi extender and Netgear WiFi router. Also, you can connect both of the devices using the Ethernet cable as well as wirelessly via WPS button.
Ethernet Cable
- Un-box the Setek device, and take out the extender, place it near to the router.
- You will need an Ethernet cable to make a connection between the router and extender.
- Then, insert the cable to the LAN port of the router and WAN port of the extender.
- It is time to turn on the Setek network device, just plug it in the wall socket and press the power button.
WPS Button
- To link router and extender together with the help of the WPS button, turn on the extender first.
- Then, find and press the WPS button on the router and Setek extender to connect them together automatically.
Now, have a look steps how to access the extender interface to the complete the Setek range extender setup written down in a section.
How to Log in to Extender Interface Using Computer?
Start the login process by connecting your computer or laptop with the help of LAN cable and then apply steps written down here.
- Turn on the computer by pressing the power button and open web browser.
- Search the IP address written on the range extender user manual along with the login credentials.
- By searching the IP address, you will reach to the extender interface login page,
- Just type the login credentials like username and password, click on the Next button.
- You will enter the interface dashboard of the Setek extender.
Adjust the settings, network, update the system, change the WiFi password and enable features can be easily done with the help of the extender interface dashboard.
Now, go through some of the troubleshooting tips that will help you to dispel any technical error, if occurs during the setup.
Troubleshooting Tips Related to Setup
- If you want to link the extender to the router with the Ethernet cable then make sure it is in good condition.
- Never user the outdated version of the web browser to access the Setek WiFi range extender interface dashboard.
- Make sure you are searching correct login IP address and credentials to reach the interface.
If you have stuck at any step written here then you can take help from the Setek SE-01 manual to setup, which is available on internet.
The Ending Lines
Here, you have get to know how to setup the Setek range extender in your home with the help of some simple steps given above. The installation includes connecting the extender to the router, accessing interface of the Setek device, and troubleshooting tips.
William A seasoned educator and programming enthusiast, William specializes in offering top-notch <a href="https://www.programmingassignmenthelp.uk/">Programming Assignment Help UK</a> services. With 5 years of experience and a passion for guiding students, he ensures every learner achieves academic excellence in their coding journey.